
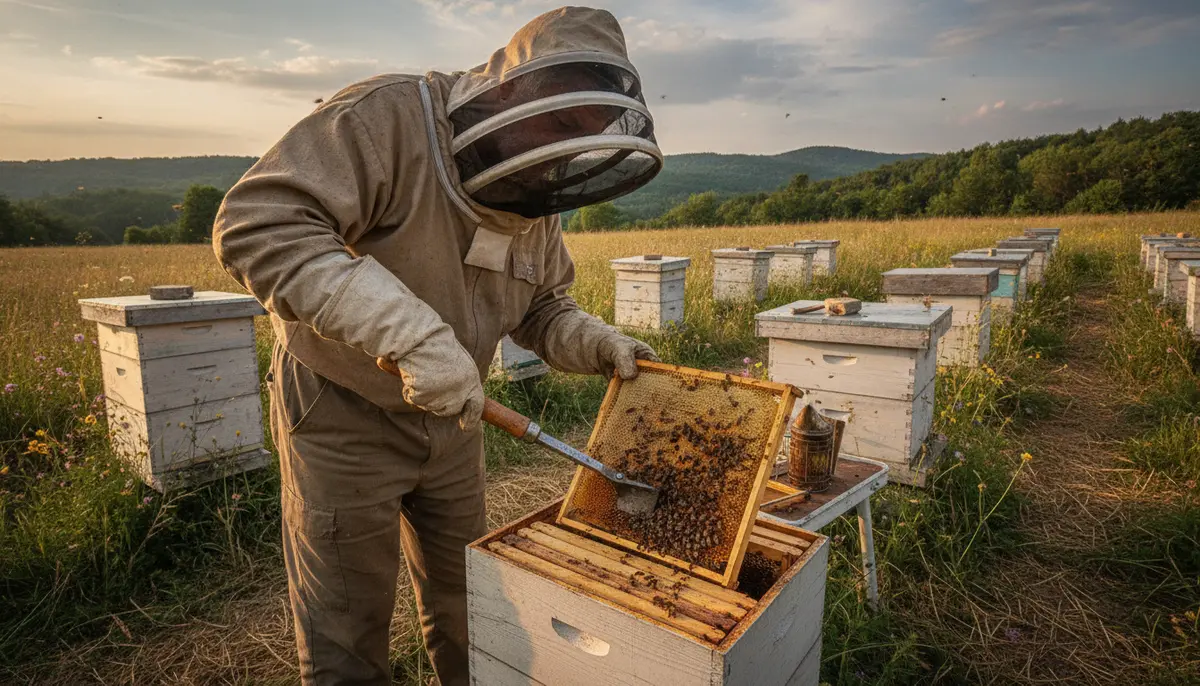
The Beekeeper’s Third Hand: A Deep Dive into the Evolution and Utility of the Hive Tool
The Indispensable Extension of the Beekeeper’s Arm
In the world of apiculture, we often find ourselves enamored by the high-tech innovations of the modern age—thermal imaging cameras for winter clusters, automated honey extractors, and electronic hive scales. Yet, despite these advancements, the most vital piece of equipment in any beekeeper’s kit remains a simple, unadorned length of forged steel: the hive tool.
As noted in historical reflections on the craft, the hive tool is a strangely difficult object to pin down. Its development wasn't marked by a single "eureka" moment or a world-changing patent like the Langstroth hive itself. Instead, it evolved as a pragmatic response to the biological reality of the honeybee. Bees are obsessive architects, and their primary mortar is propolis. Without the mechanical advantage provided by this "lowly" tool, the movable-frame hive would be anything but movable.
For those just beginning their journey, understanding the nuances of this tool is as critical as learning bee biology. It is the bridge between the beekeeper’s intent and the hive’s structural integrity.
The Evolution of the Pry: From Makeshift to Mastered
Before the standardization of the hive tool, early beekeepers relied on common household items. Flat-head screwdrivers, putty knives, and even heavy-duty kitchen knives were drafted into service. However, these tools often failed for two reasons: they lacked the necessary leverage to break the "bee glue" seal, and they were frequently too thin, leading to gouged wood and frustrated beekeepers.
The modern hive tool emerged as a specialized instrument designed to fit the specific dimensions of the "bee space." Its development mirrored the refinement of the hive itself. As beekeepers realized that prying from the center of a frame caused it to bow or break, the tool’s ends were widened and sharpened to distribute pressure.
Today, we see a variety of designs that cater to different regional styles and personal preferences. While the core function remains the same, the subtle shifts in geometry represent over a century of trial and error in the apiary. If you are just starting out, you might find our guide on Essential Beekeeping Tools Every Newbie Needs: Beyond the Hive and Suit helpful for contextualizing where the hive tool fits into your broader inventory.
Anatomy of the Tool: Choosing Your Weapon
Not all hive tools are created equal. While they may look like simple pry bars, the specific "flavor" of tool you choose will dictate your rhythm during an inspection.
The Standard (Flat) Hive Tool
The most common variety is the 7-to-10-inch flat tool. It features a wide, sharpened scraping edge on one end and a 90-degree "L" bend on the other.
- Pros: Excellent for scraping burr comb and propolis off the tops of frames and the inner cover. The flat end is ideal for prying apart hive bodies.
- Cons: It can be difficult to get under the "lugs" (the ears of the frames) without accidentally crushing a few bees or slipping.
The J-Hook Tool
The J-hook has become a favorite for many commercial and hobbyist beekeepers alike. It features a curved hook on one end and a flat prying surface on the other.
- Pros: The "J" is designed to hook under the frame lug, using the hive wall as a fulcrum to lift the frame straight up. This minimizes the "rolling" of bees and reduces the physical effort required to break the propolis seal.
- Cons: It is generally less effective at heavy-duty scraping than the standard flat tool.
The Italian (Maxant) Style
Characterized by a more ergonomic handle and a distinctively shaped prying end, this tool is often preferred by those with smaller hands or those who find the flat steel of standard tools uncomfortable during long days in the yard.
The Physics of the Pry: Mastering Technique
Using a hive tool effectively is less about brute force and more about physics. The honeybee uses propolis—a resinous mixture of tree sap and wax—to seal every gap smaller than the "bee space" (roughly 1/4 to 3/8 of an inch). In the heat of summer, propolis is pliable; in the cool of spring or autumn, it is as brittle and strong as industrial epoxy.
Breaking the Seal
When opening a hive, never try to lift the entire inner cover from one corner. This creates a vacuum effect and a sudden "pop" that can agitate the colony. Instead, insert the flat end of the hive tool into the seam and give it a slight twist. This lateral movement breaks the propolis bond across a wider surface area with less vibration.
Lifting Frames
The most common mistake for beginners is prying a frame from the center of the top bar. This can result in the top bar snapping off, leaving the rest of the frame stuck in the box—a nightmare scenario during an inspection. Always pry from the ends, near the lugs. If using a J-hook, the hook should sit firmly under the lug, and the "bump" on the back of the hook should rest on the adjacent frame or the hive wall to provide leverage.
For those Navigating the First Year, mastering this subtle physical interaction is one of the quickest ways to build confidence and keep your bees calm.
Beyond Prying: The Multi-Tool of the Apiary
While its primary job is prying and lifting, the hive tool serves a dozen other roles that make it the only tool you truly need in your hand at all times.
- Scraping Burr Comb: Bees often build "bridge" or "burr" comb between frames or between the boxes. Keeping these surfaces clean is essential for maintaining proper bee space.
- Cleaning the Bottom Board: During a spring clean-out, the hive tool is used to scrape away dead bees and accumulated debris that the colony hasn't yet managed to clear.
- Propolis Harvest: For beekeepers interested in the medicinal properties of the hive, the tool is the primary instrument for harvesting clean propolis.
- Emergency Hammer: While not its intended use, the flat side of a heavy-duty tool is often used to gently tap a loose nail back into a frame or hive body in the field.
Maintenance, Hygiene, and the "Clean Tool" Rule
Because the hive tool moves from frame to frame and hive to hive, it is a potential vector for disease. Pathogens like Paenibacillus larvae (American Foulbrood) can survive on a tool for years.
Sanitization Protocols
The gold standard for tool hygiene is the use of a propane torch. Before moving from one apiary to another—or after inspecting a hive that looks "off"—beekeepers should use the torch to heat the metal until any wax or propolis residue is scorched away. Alternatively, a bucket of water mixed with a strong detergent or a 1:10 bleach solution can be used to scrub the tool, though this requires thorough drying to prevent rust.
Sharpening
A dull hive tool is a dangerous hive tool. If the edge is rounded, it will slip off the frames, potentially leading to hand injuries or crushed bees. Periodically use a metal file or a bench grinder to restore a sharp, beveled edge to the scraping ends. You don't need a razor edge, but it should be sharp enough to easily slide into the tightest propolis-sealed cracks.
The Emotional Weight of a Simple Tool
There is a reason the source material describes the hive tool as "lowly" yet difficult to fully grasp. It represents the tactile nature of beekeeping. It is the tool that gets covered in the scent of the hive—a permanent perfume of beeswax, smoke, and resin.
As you progress from a neophyte to a seasoned pro, you will likely develop a preference for a specific weight or length of tool. You might even find yourself lost without it, patting your pockets in a minor panic when it isn't where it should be. This "lowly" tool is the silent partner in every honey harvest and every successful wintering.
Whether you are selecting your first kit from the Best Beginner Beekeeping Kits of 2024 or you are a veteran with decades of propolis under your fingernails, respect the hive tool. It is the simplest piece of technology we own, yet it is the one we can least afford to lose.